
Van Storage and Organization


*Disclaimer: This post contains affiliate links. If you choose to make a purchase using one of our affiliate links, we will make a commission at no additional cost to you. Thank you for your support!
Storage is extremely important when living and traveling in 80 square feet. When we built our Vantasy camper van we made sure to include potential storage areas in our plans. We not only wanted to make sure we had enough space for all our necessities, but also some fun items like inflatable kayaks and climbing gear :-)
In this post, I’m going to go over all the different storage areas inside and outside our van, what we use them for, and any organizational items we utilize to make them more functional.
The Garage

The garage in our van is approximately 40 inches x 24 inches. Since we chose to have a convertible bed/dining table, we sacrificed some garage space compared to vans with a fixed bed. We use the garage in our van to store tools, an air compressor, collapsible bucket, the water filter, camp chairs, MoonShade awning, camp table and leveling blocks. The most frequent item we use from the garage are the leveling blocks so we ensure they are always right at the front when we pack the van.
2. Rear Door Panels


When we finished the rear door panels, we chose to splurge on MOLLE Storage Panels from FreedonVanGo for the doors. These allow us to utilize the door panels for additional storage in the garage area. We bought small, medium, and large storage pouches and straps from Amazon to attach to the panels. We used velcro straps to attach our shovel, hatchet, and shore line power cable to the panels. We use the pouches to store a hose to fill the water tank and various tools. The panels and pouches on the upper part of the doors are accessible from inside the van, so we can store items we want to access inside.
3. Under Floor Storage

Creating an under floor storage area beneath the bed/dining table wasn’t in our original plans for the van. However, we quickly realized that with the water tank and electrical system under the benches, the benches would be too high for us to touch the ground when we sat on them so we decided to raise the floor and create a storage area. I’ve seen under floor storage areas like this in other van builds, but they normally utilize a drawer to access the storage area. We felt like this method wouldn’t allow us to utilize the space fully so we build a removable top panel. Currently the top panels are just 3/4 inch plywood, but we do intend to finish them with extra flooring in the future. Since this area isn’t the easiest to access regularly, we use it to store items that we rarely use, but need to bring with us. We always keep a telescopic ladder, the straps for the Maxtrax, and sleeping bags in this storage area. When we bring the inflatable kayaks with us, we keep the seats, paddles, and hand pump under here as well.
4. Bench Storage

Under the dog bed/bench we have a storage area that’s about 24in x 32in x 12in. This area is used to store items that we want easier access to since the bench is usually unoccupied. We keep backpacks, hammock, a single burner camp stove and fuel, an extension cord, and other miscellaneous items that we shove in there for safekeeping while we drive :-).
5. Upper Cabinets


Since neither of us are tall, we wanted to maximize upper cabinets for storage space. We have upper cabinets on either side of the bed in the back. These are high enough so we each have plenty of clearance sitting on the bed or benches. We use these cabinets in the back to store clothing, towels, travel dog beds, portable fans, and our laundry.
We also have upper cabinets above the kitchen area behind the drivers seat. These cabinets are larger than the ones in the back. This section of cabinets are split into 4 sections. One section is for our toiletries, medicine, and other personal care items. The second section is dedicated to food storage. We can fit quite a big of food in this single cabinet. The third section is for our plates, bowls, strainer, cutting boards, and measuring jug. We will also put overflow food in this cabinet. The fourth cabinet is where we keep our electric kettle, coffee, tea, mugs, daily greens, and shaker bottles. We lined all the cabinets with Gorilla Grip Drawer, Shelf, and Cabinet Liner to prevent items from shifting in the cabinets and reduce any rattling noise. So far it’s been working great! We utilize storage bins in most of these upper cabinets. We really like these BINO storage baskets we found on Amazon. They are good quality and are made of plastic so they are easy to clean if something spills. We also have these clear plastic containers in our personal care cabinet. They are taller and skinnier so they hold odd shaped and taller items items better. We mainly use them for Jess’s foldable hairdryer, diffuser, and full sized toiletries.
6. Kitchen Cabinets and Drawers


The kitchen area has 2 cabinets and 3 drawers for storage. Just like the upper cabinets, we used the Gorilla Grip liner in all the drawers to keep items in place and reduce any rattling noise. The top left drawer is used for cutlery and all our cooking utensils. This compact cutlery drawer organizer is the perfect space saving cutlery holder. I added some drawer liners to each section to reduce any rattling noise and everything has stayed in place even after driving on extremely rough terrain. The next drawer down is used to store our pans, stemless wine glasses, and any overflow food. Below that drawer is a small cabinet we use to store our air fryer and other miscellaneous items. The large middle cabinet houses our propane box, trash can, and cleaning supplies. We need some sort of storage bin solution for this cabinet but we haven’t quite figured out what would work best in the space. Finally, the top right drawer is our van’s junk drawer. This is where we keep oven mitts, extra dish towels, pen and paper, and other random items.
7. Headliner Shelf
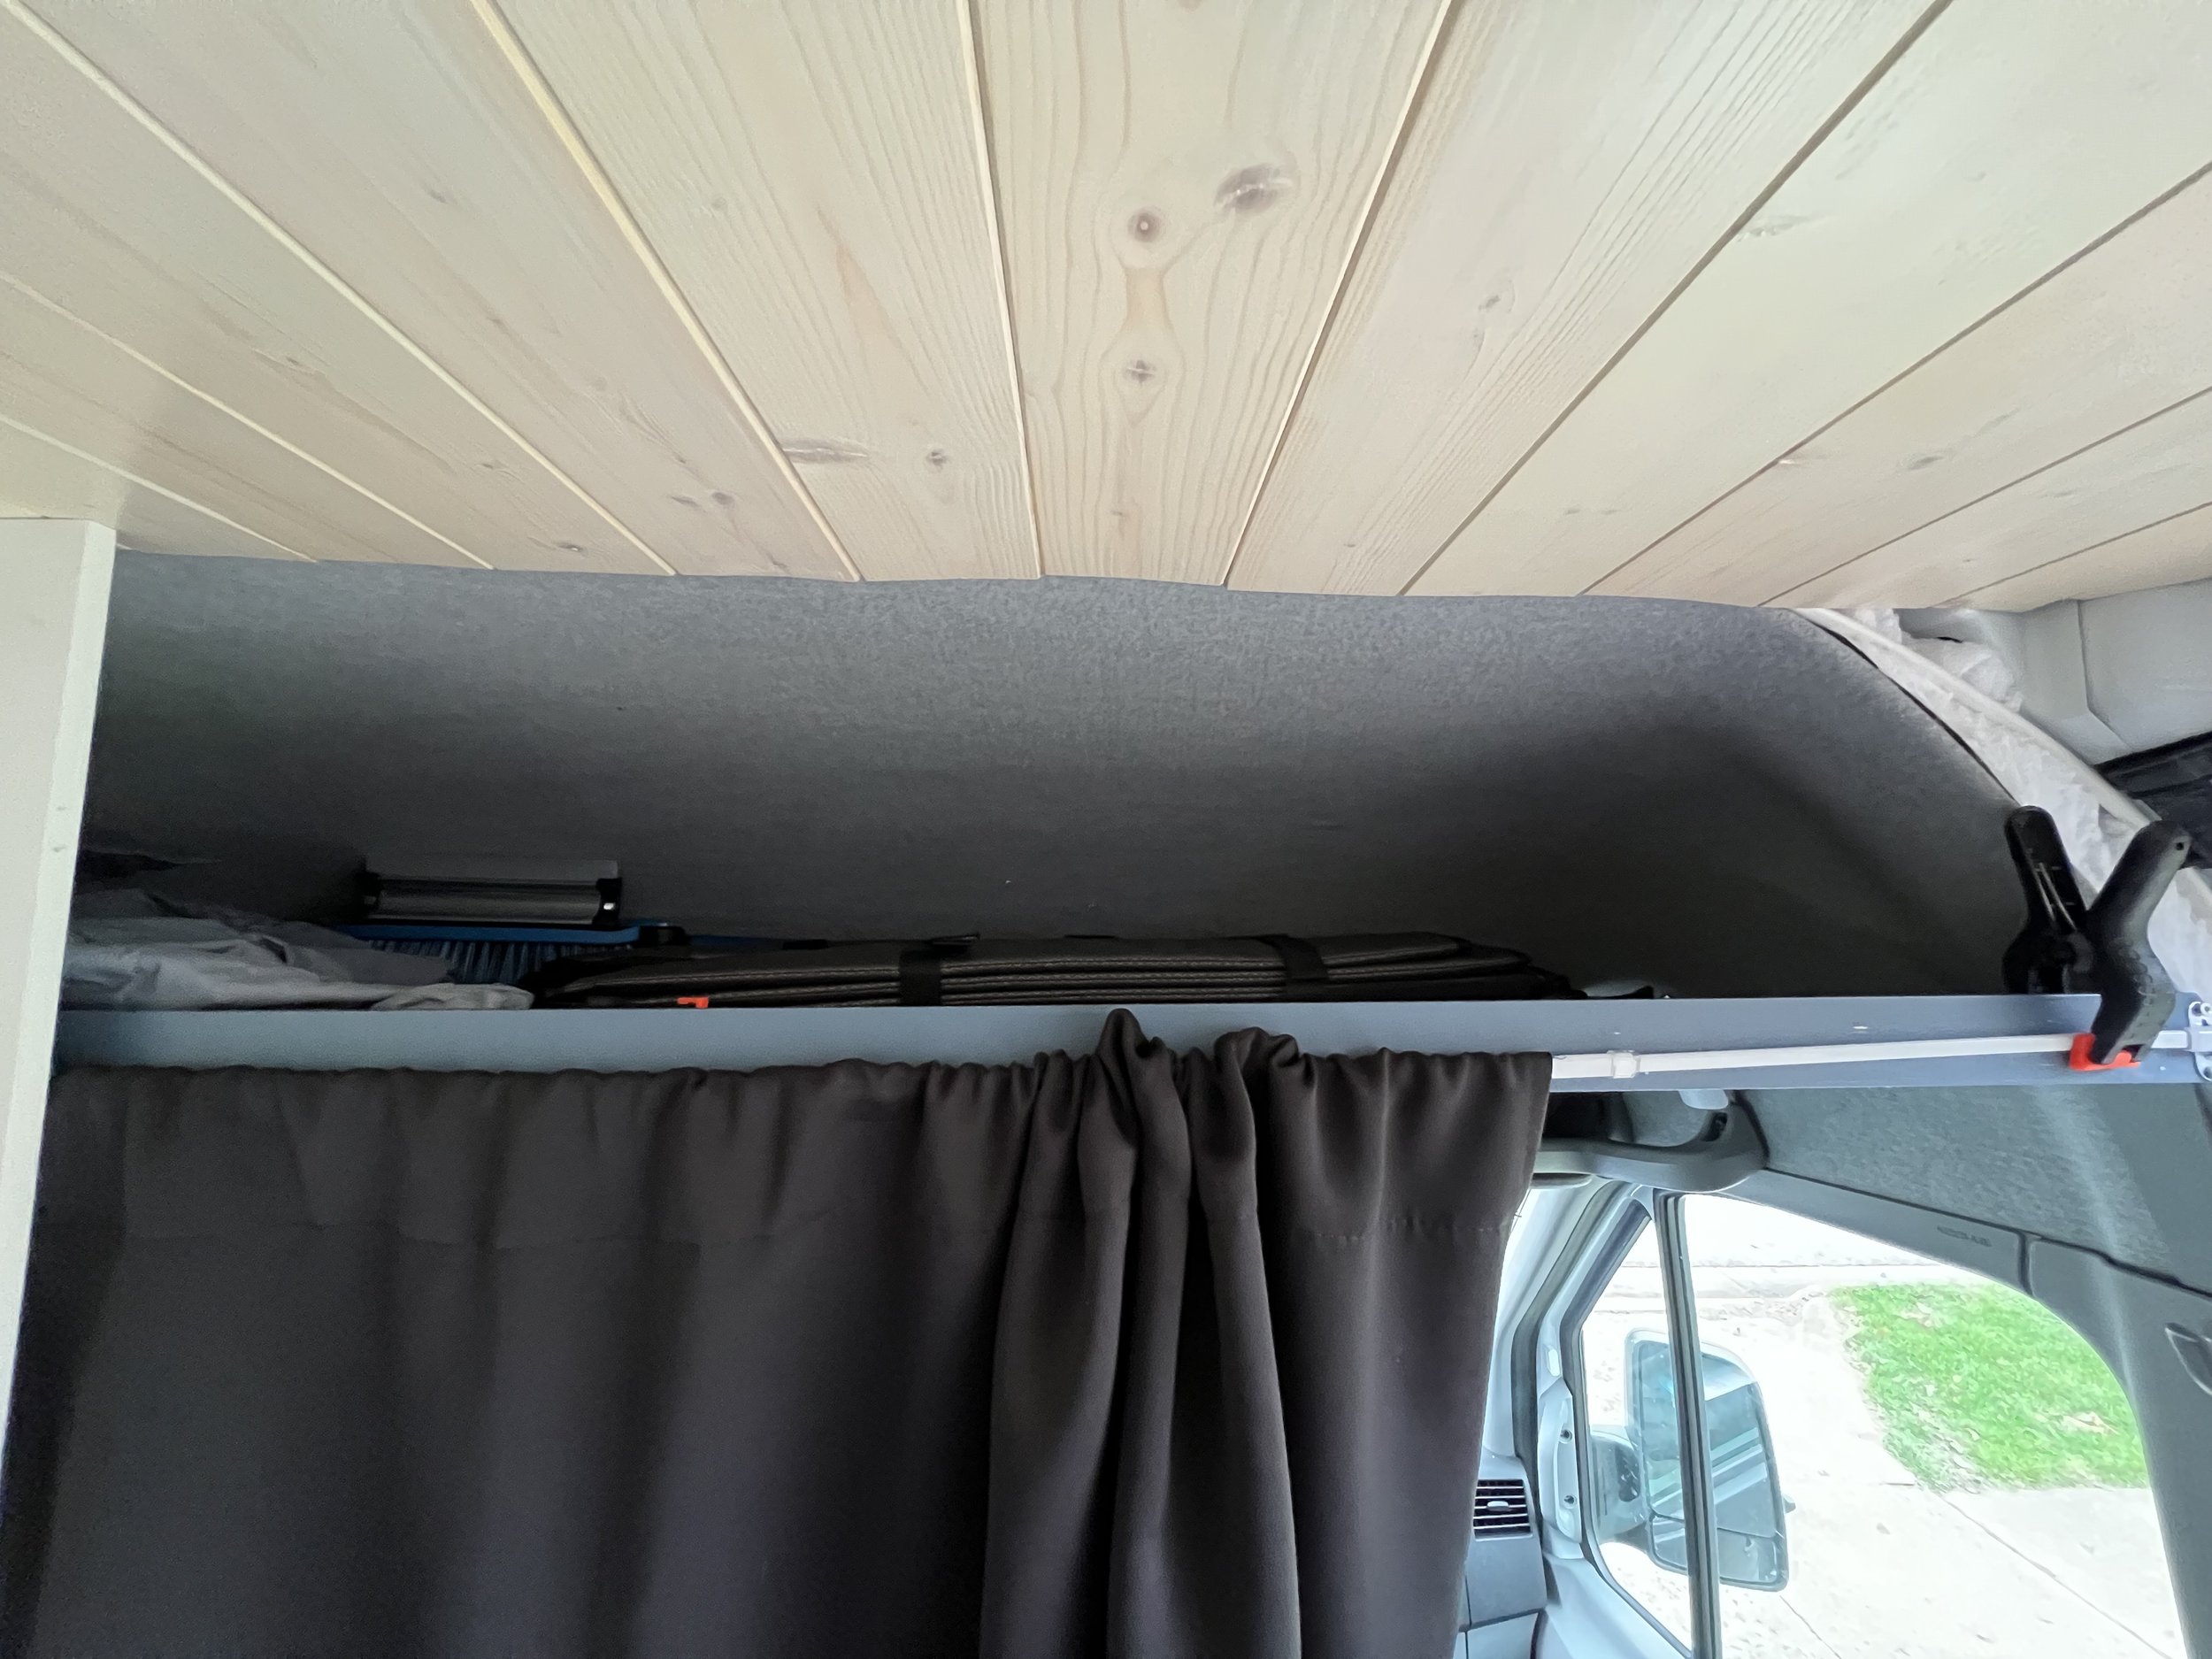
The headliner shelf above the front seats has been a great use of that space. We bought a van headliner shelf kit that included the hardware and a template for the headliner shelf. The kit we used is out of stock but this headliner shelf kit is similar. We store our ice scraper up there in warm months, front window covers, coats, reusable grocery bags, and a hiking backpack. We also keep a few heavy duty clamps up there. We previously used these clamps to hold up the curtain before we got a rod. Now we clamp them onto the shelf and use them as hooks to dry towels or bathing suits. One issue we have with the shelf is Jess is too short to reach the back so she can’t retrieve items that get pushed to the back of the headliner shelf. We may have to start carrying a step stool with us so she can reach :-)
8. Seat Back Storage

After the first few trips in the van, we noticed the floor area near the sliding door getting cluttered with random items we wanted easy access to when going in and out of the van and it started to get really annoying. Our solution was buying these seat back organizers from Amazon. We chose them because they were fairly inexpensive compared to some other options and we liked that you could easily grab things out of the pockets on the way out. It was also super easy to install since you just clip it around the seat. We use ours to store dog leashes and extra poop bags, longer dog leads we for camp sites, dog hiking harnesses, bug spray, and raincoats. We are also still able to use the seat swivel with this seat back organizer. The seat organizer came in a 2 pack so we also put one on the back of the drivers seat. This one is harder to access unless the seat it pushed forward so we use it store lighters, infrequently used charging cables, hats and gloves (when we’re in milder climates), duck tape, and our hands free dog leash since we don’t use it often.
9. Shoe Storage

We wanted a way to organize our shoes near the sliding door the van so we bought this wall mounted shoe organizer for the side of the cabinet. It holds 3 pairs of bigger shoes, but you can fit a pair on sandals in one of the pockets. We use this for our hiking shoes and slip on sandals. We also have a small cubby on the step where we keep our water shoes. That way they are out of the way when they are drying.
10. Storage by the Front Seats


The newest addition to our van is a raised platform for a dog bed between the front seats. We made sure that it’s low enough that we can still use the seat swivel as long as Bella isn’t napping on it :-). We use the space under the platform to store dog food, bowls, and treats. We can also fit extra shoes under here. We are still modifying this platform so it isn’t fully finished yet. We also store our outdoor rug in front of the passenger seat. We mentioned before, Jess is pretty short and with the seat swivel she can’t touch the ground when she sits in the passenger seat which made it very uncomfortable for her on long trips. When we were deciding where to store the outdoor rug she thought it looked to be thick enough to use as a footrest and it ended up being the perfect height for her to comfortably ride in the passenger seat. It also doesn’t take up the full space so it’s easy to move out of the way for when Kevin sits in the passenger seat.
11. Rooftop Storage
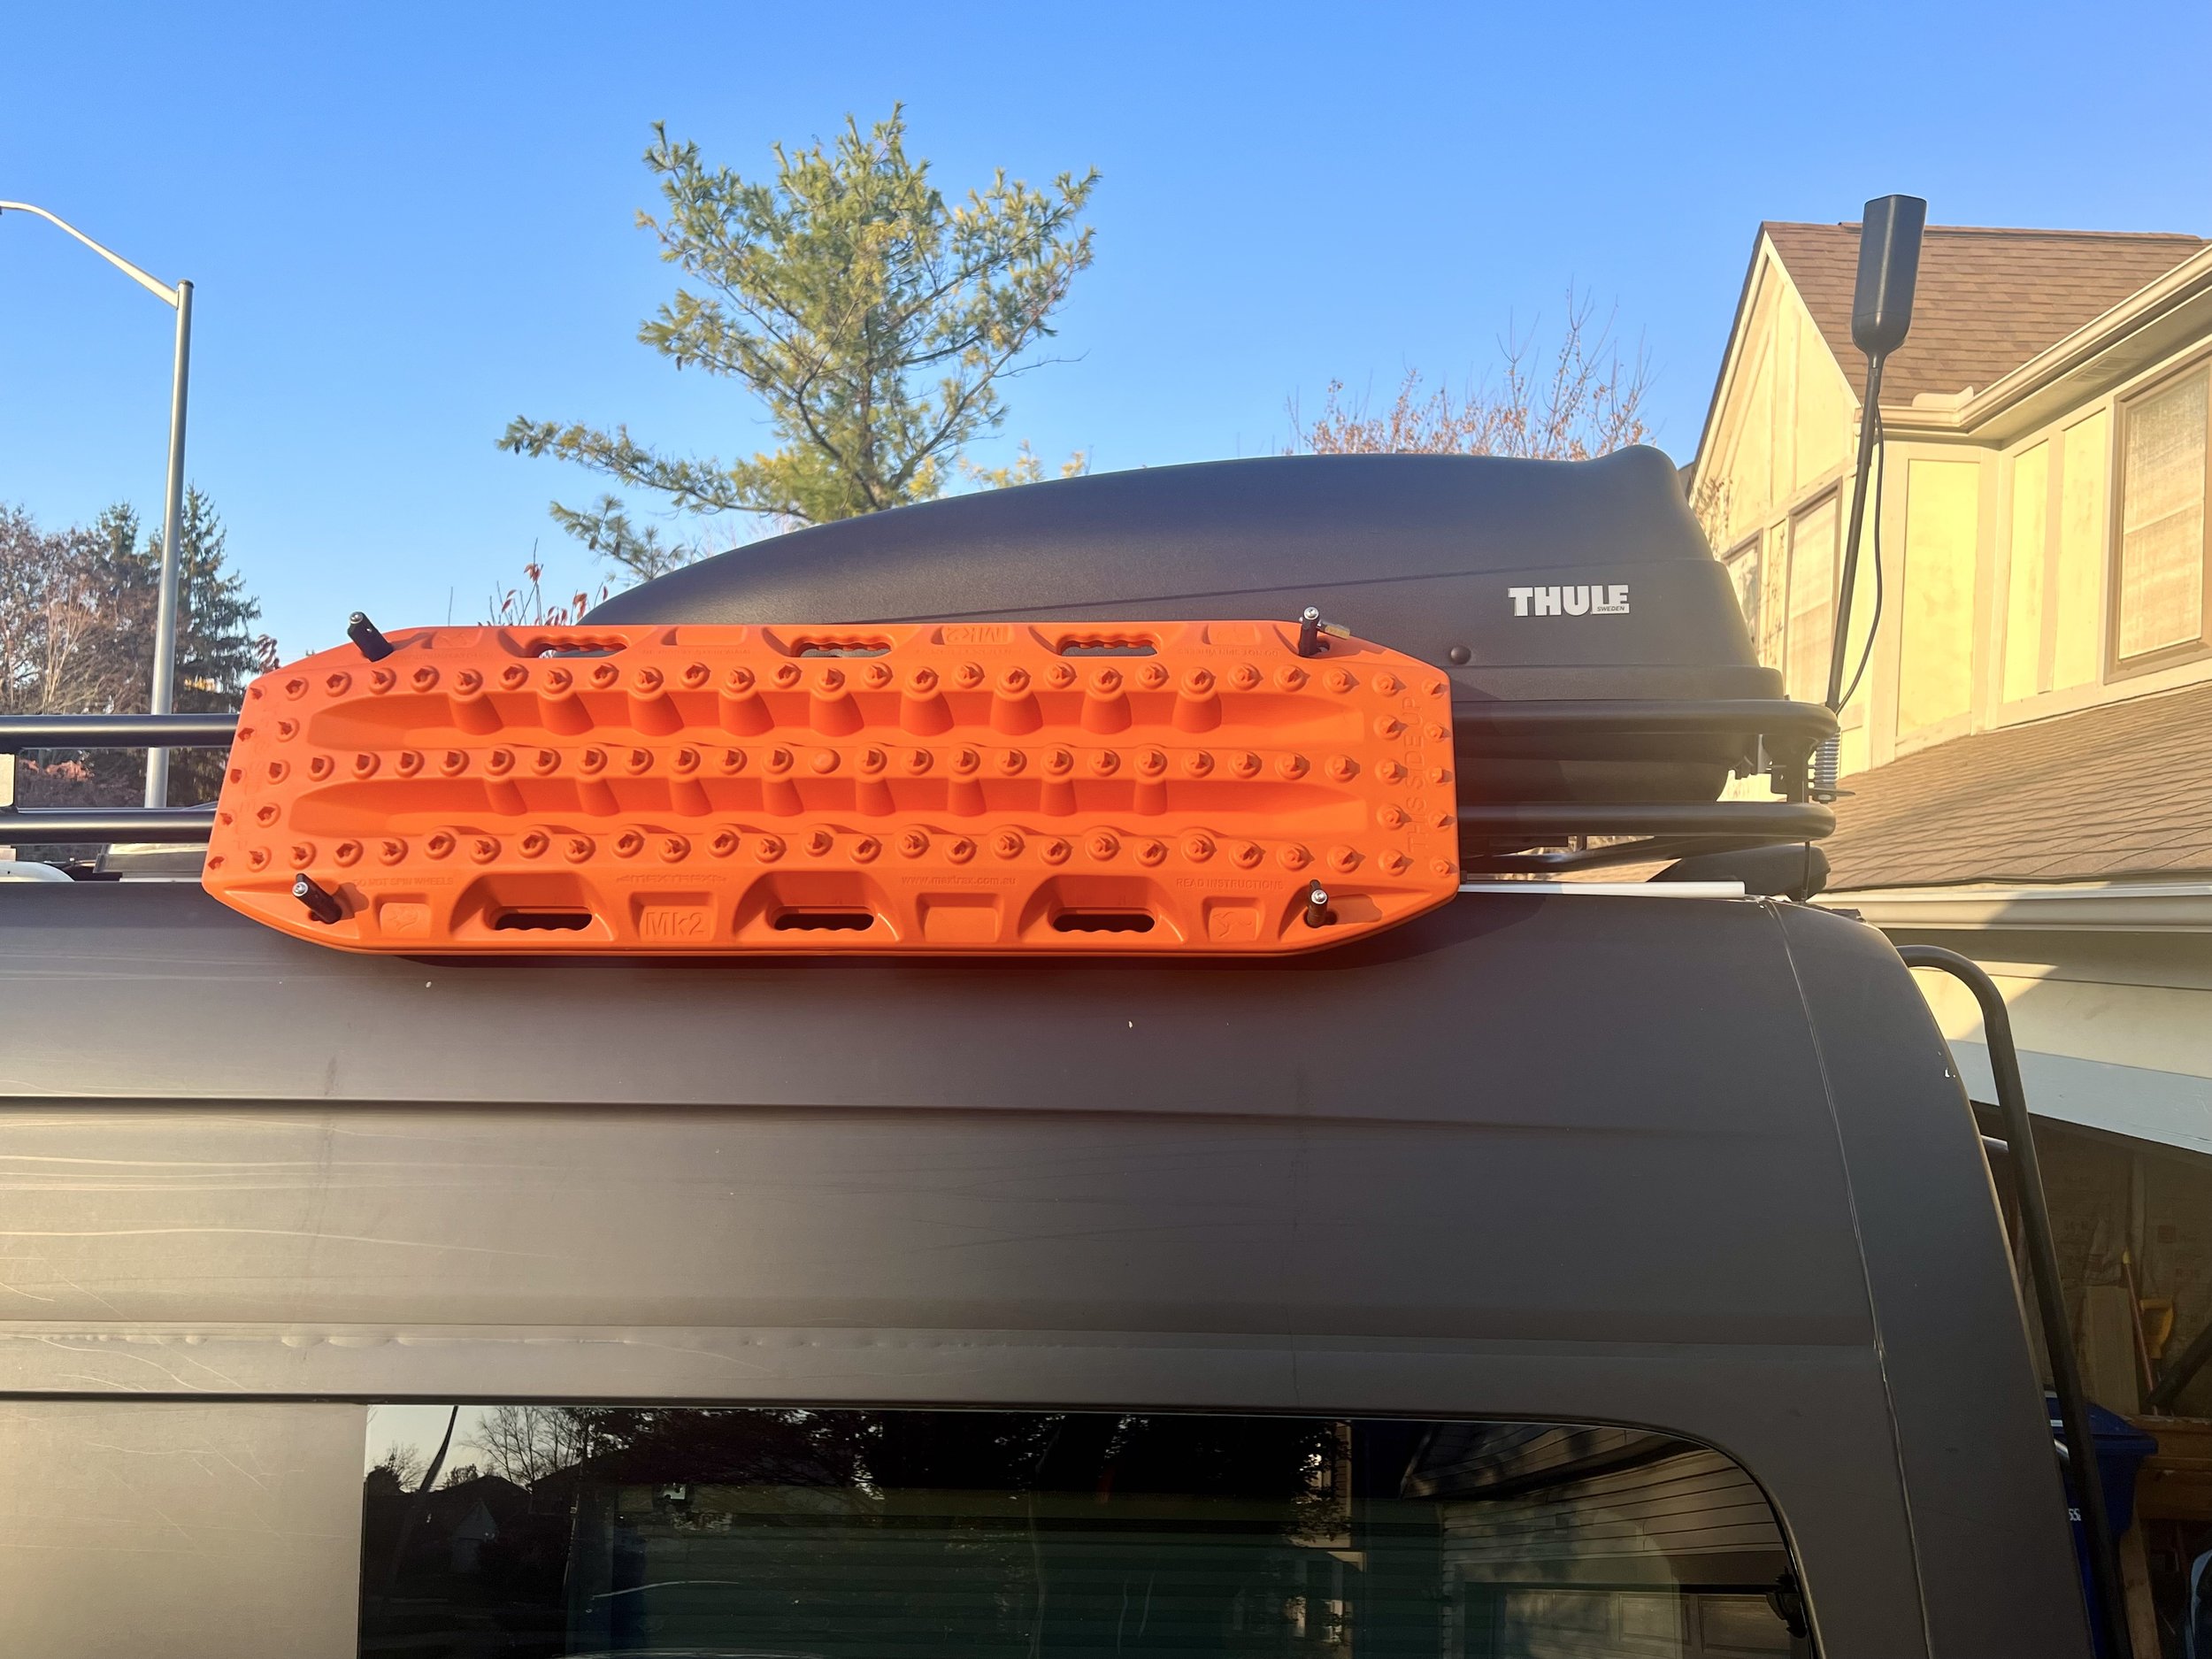

Having a smaller garage space, we knew we needed to utilize the roof of the van for storage. We have this roof rack from FreedomVanGo. With the configuration of our solar panels and fan, we have just enough space for a Thule cargo box. It’s about the size of one our solar panels. We use this to store our inflatable kayaks and life jackets. We access it using the ladder attached to our back door. We also have our Maxtrax recovery boards mounted on the side of the roof rack using Maxtrax Mounting Pins and Roof Rack Recovery Board Mounts from FreedomVanGo.
Final Thoughts
Overall, we are happy with all of our storage options inside and outside the van. We will continue to tweak things and move things around as we use the van since the storage solutions need to make sense for how we live. In the future we would like to add additional storage to the back of the van since it would be nice to bring bikes with us on adventures.
Want to see more of our van? Check out our full van layout here.