
Camper Van Walls and Ceiling
*Disclaimer: This post contains affiliate links. If you choose to make a purchase using one of our affiliate links, we will make a commission at no additional cost to you. Thank you for your support!
As soon as we started planning our van conversion, we knew we were going to use some sort of wood product as our walls and ceilings. The goal was to use light weight wood that could be stained or painted. With a van being such a small space, we knew we wanted the walls and ceiling to be a lighter color to make it feel as open as possible. We chose to use 1/4 inch tongue and groove Pine boards for the ceilings and walls. For the lower part of the walls that wouldn’t be visible, we used 1/4 inch Birch plywood. If you don’t like the planks on your walls and ceiling, you could always use plywood for everything instead.
Before you get started on the walls, your furring strips need to be installed. You also need to make sure your roof rails are installed and you’ve finished cutting any holes you need in your roof since it will be harder to access once the ceiling is covered. Your fan or air conditioning unit should also already be installed so you can cut the wood to fit around them. You should also have your electrical wiring and lights planned out. It will also be easier to install a weBoost at this time if you choose to have one. We put ours in at the very end of the build and wished we had done it sooner.
Installation
Materials and Tools Used:
Staining the Boards and Plywood

Jess staining boards
The first step is prepping the plywood and boards to be stained. We cut the plywood to the appropriate size before we stained it, but we kept the tongue and groove in 8 foot boards. We sanded the plywood and boards with 320 grit sandpaper until they had a nice smooth finish then we wiped any excess sawdust off before staining.
We laid a drop cloth down, then set the saw horses up on top of it, and placed the wood on the saw horses. Luckily, we were able to stain 4 planks at a time on our saw horses since we ended up using about 64 planks throughout the build.
Next you need to apply pre-stain to the wood with a staining rag so it will absorb the stain more evenly. We recommend using gloves for this part of the process. We used Minwax water based pre-stain and followed the instructions on the can. After you give the pre-stain 15 minutes to dry you can begin staining. We used Minwax water based semi-transparent stain in the White Elm color. We really liked how it lightened the wood, but we could still see the wood grain. We applied the stain with a foam brush and then wiped off the excess stain. Then we waited at least an hour before applying a second coat. After the stain dried for at least 2 hours, we applied 2 coats of Minwax water based polyurethane per the instructions on the can.
After 24 hours, the plywood and planks are ready to install. Jess stained boards in batches and we installed them as they were ready while we worked on other projects.
Installing the Tongue and Groove Boards

We decided to start on the ceiling and work our way down in both directions. We also started in the rear and worked towards the front. The first step is figuring out the center of the van. We used the center of our fan for our starting point. Then we measured from the rear doors of the van to the fan, and used a miter saw to cut the board to the correct length. To install the board we marked where the furring strips were on the board, so we knew where to screw. Then we drilled a small pilot hole to prevent the wood from splitting and used a countersink bit to allow the screw head to be flush with the board. We used a number 6 screw that was 5/8” long to install the boards. You can use a drill or an electric screwdriver to screw them to the furring strips. We found the electric screwdriver to be the best option to prevent the wood from splitting since its not as powerful as a drill. Plus we didn’t have to keep swapping out bits on the drill between drilling holes and screwing in the boards.
We installed the middle board on the other side of the fan using the same method as above. Once you have the two middle boards in, you can start working in either direction. The second board from the center board that will need to be cut around the fan. This is where the jigsaw comes into play. You will have to figure out how much wood to trim out of the board so the panel sits flush with the edge of the fan. If using tongue and groove make sure you cut the correct side of the board out (we made this mistake the first time we made the cut). Continue installing boards on the rest of the ceiling.
Installing Puck Lights

We chose to install our puck lights while we installed the wood boards on our ceiling. The the third board on each side of the center board is where we installed our puck lights. We decided on 12 puck lights in total, 6 on each side. We decided to have equal spacing on our lights along the length of the van. Remember to take into account where your furring strips are when choosing where to place your lights since you can’t place them over furring strips. Since the whole ceiling isn’t covered, yet you should be able to see where the furring strips are. Once you have the location of the lights marked, it’s time to cut the holes with a hole saw bit on your drill. Cut one and do a test fit with the puck light. If the fit is good, continue to cut the rest of the holes. Once the all the holes are in you can attach the wiring and install the lights.
Interested in our electrical system setup? Check out our electrical system article.
Ceiling to Wall Transition
The next hardest part is going to be the ceiling to wall transition. As you have guessed by now nothing is square or level in a van build. With the curvature of the van we ended up using a table saw to make skinnier pieces to try and create a corner. Ours are not perfect, be we did add trim to make it look a little nicer. Most of it is hidden behind the upper cabinets though. Continue with the tongue and groove down the walls. Cut out any switches or outlets as you go.
Again before you fully seal up the wall, make sure all your electrical wiring for outlets, sockets, and anything else you need has been run. We left part of our walls open until we were 100% sure we were finished running electrical wiring. Another thing to consider is if you’re going to run a vent tube for your water tank, now would be a good time to install it if you plan to go behind the wall to run the tubing.
Installing Birch Plywood
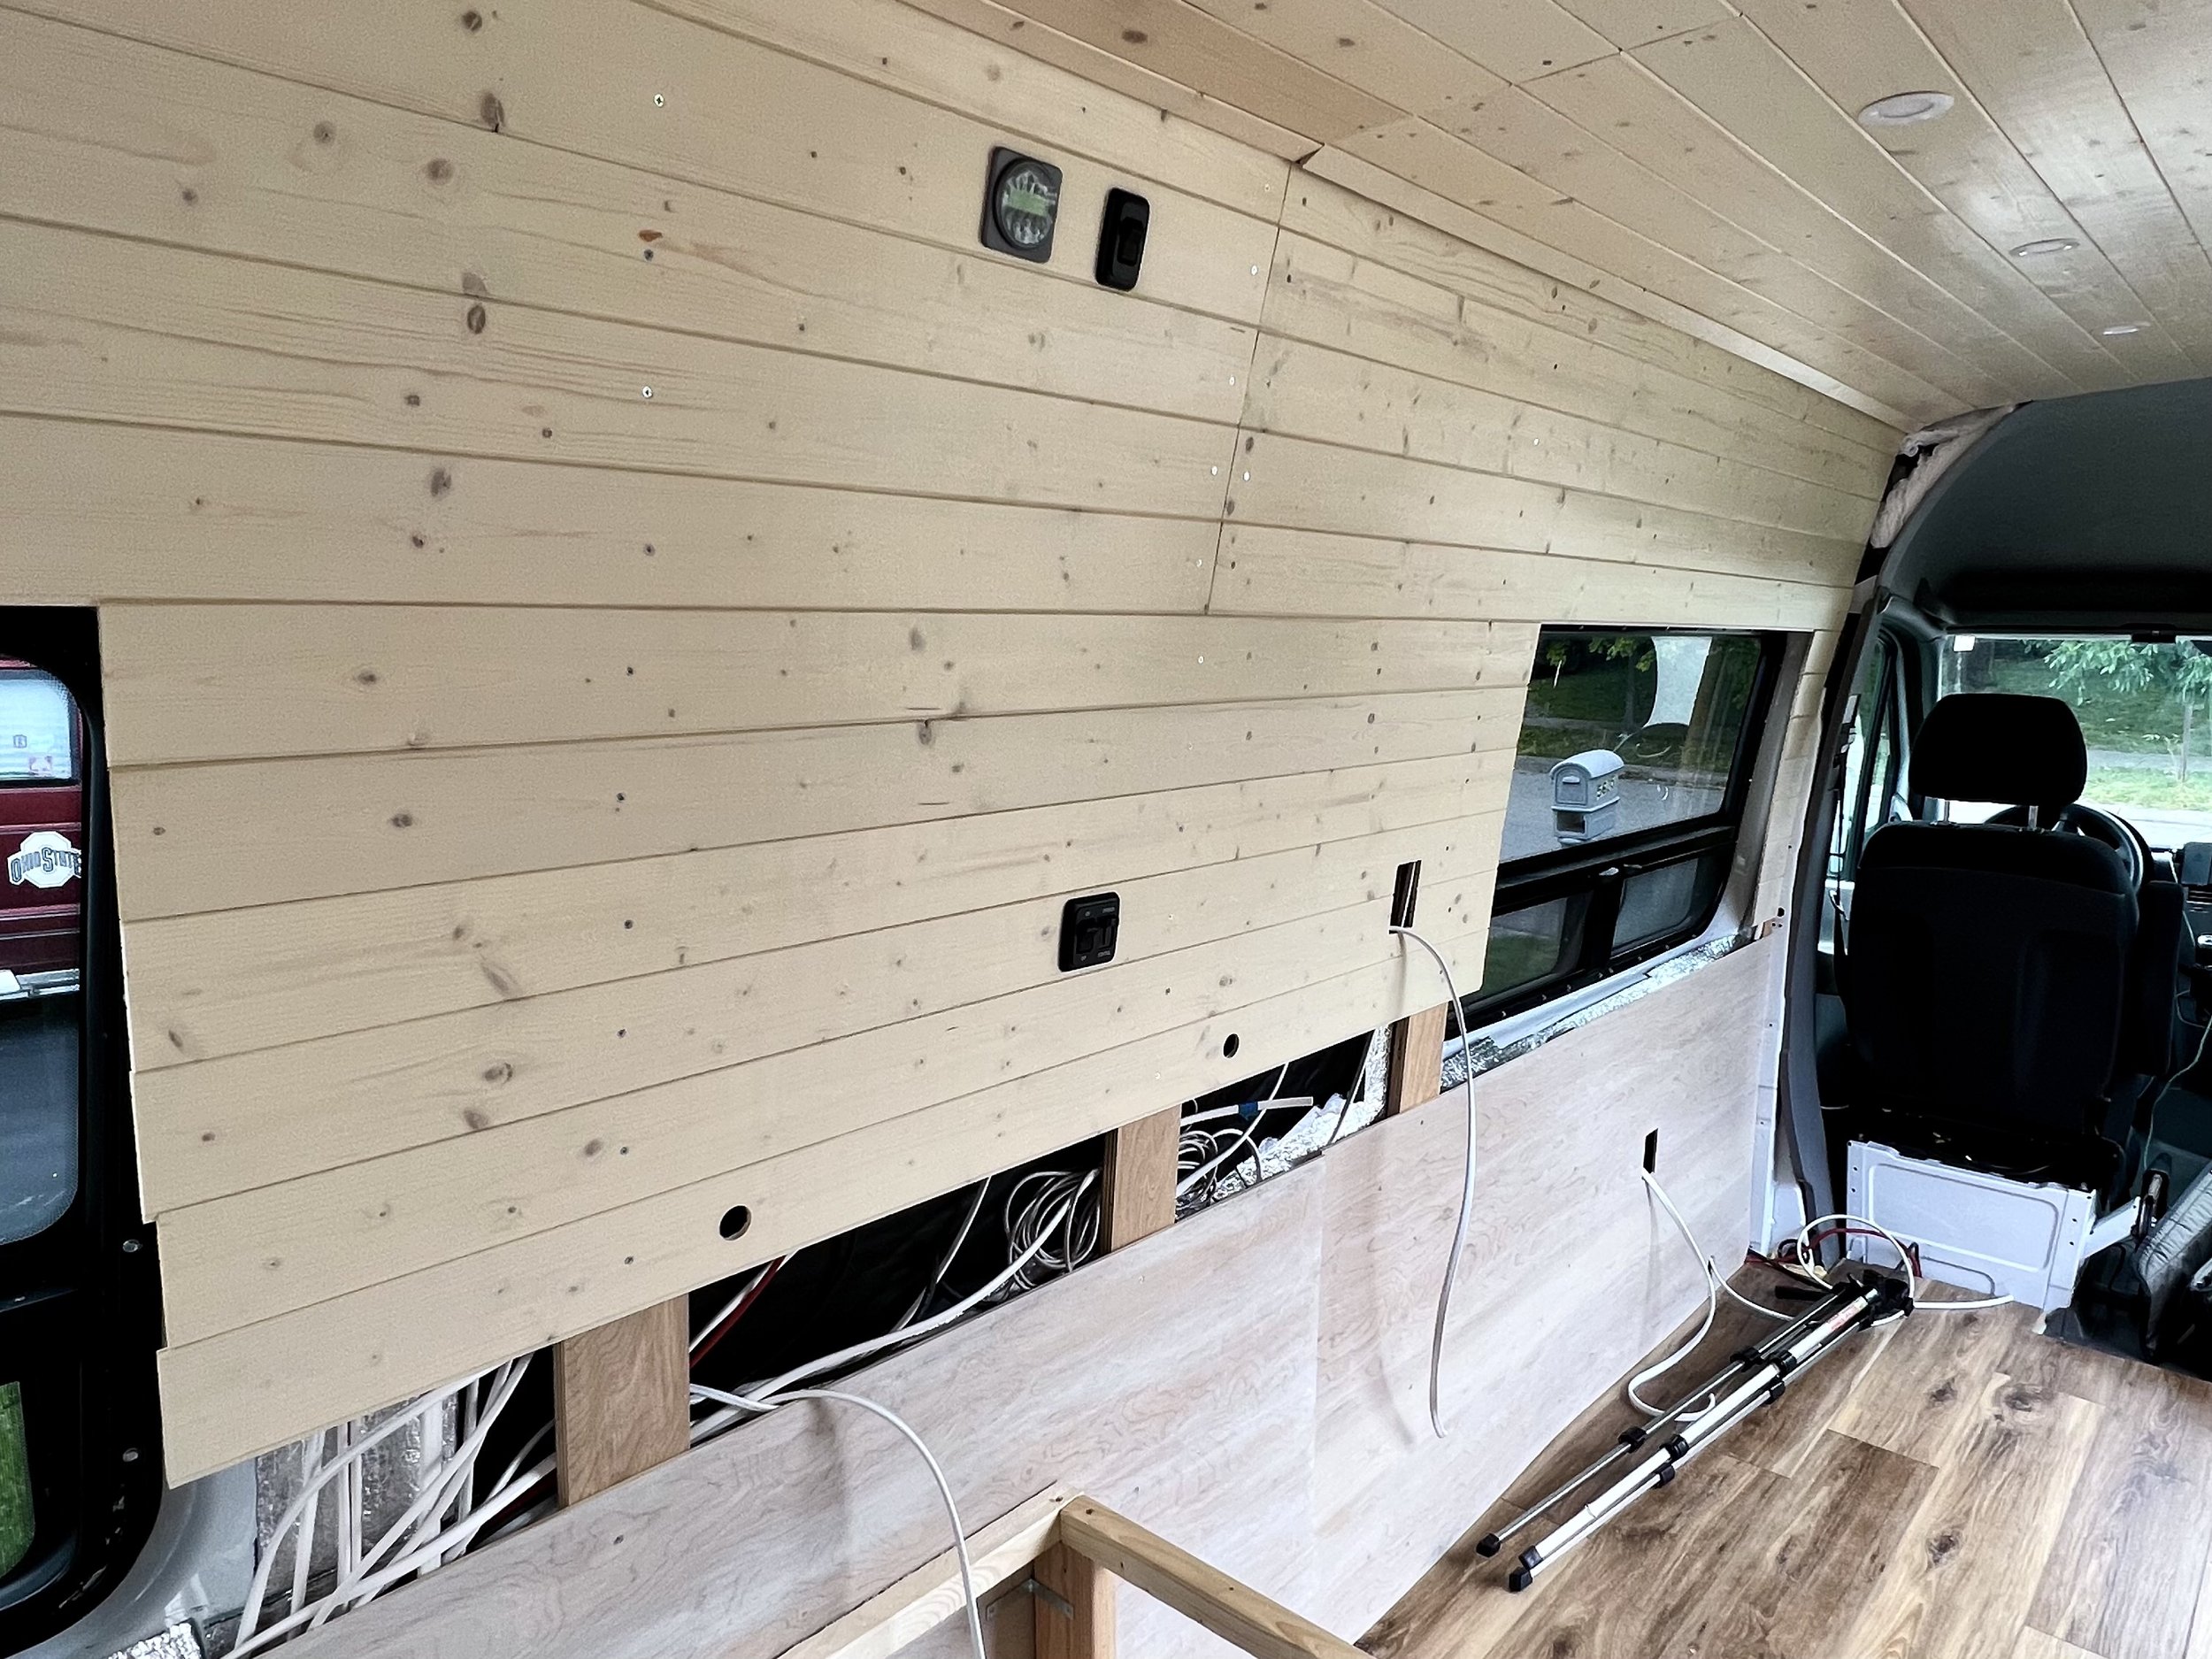
We used 1/4 inch birch plywood for the lower section of the walls since almost all of the plywood isn’t seen in the main area of the van so. We based the height of the plywood on how high up our cushions would be sitting on the benches so we chose to start the plywood right below our windows.
Before we installed the plywood, we cut out any holes we needed for electrical wiring and outlets. If you ran any plumbing behind walls, it will be easier to cut out any exit points before you install the plywood. We made our lives harder by not thinking ahead and on some of these things, so hopefully you don’t make the same mistake.
Once you are ready to install the plywood, mark where you want to drill on the board. Then drill the pilot holes and use the countersink drill bit so the screw sits flush with the plywood. Screw the plywood to the walls with the same wood screws used on the tongue and groove.

Final Thoughts
A lot of planning goes into installing your walls. We took a few weeks to fully finish our walls until we were sure we had all electrical and plumbing run since we knew it would be a pain if we had to open them back up. Take your time and think ahead. As we started installing the walls on our van conversion, it finally felt like things were starting to come together and we could see our dream was becoming a reality.
Interested in seeing more of our camper van? Check out our full van layout here.