
Camper Van Shower Build


*Disclaimer: This post contains affiliate links. If you choose to make a purchase using one of our affiliate links, we will make a commission at no additional cost to you. Thank you for your support!
Having a shower and toilet in our camper van was a necessity for us. We knew we wanted to be able to camp places that didn’t have bathrooms, but we still wanted the luxury of having a toilet and shower in our camper van.
A lot of camper van conversions have full showers that go from the floor to the ceiling. These do provide more privacy when using the bathroom; however, we felt like it made the small space of the van feel even smaller. Additionally the time you spend showering and using the toilet is low compared to everything else in the van. With that in mind we ultimately decided on installing a convertible shower.
We got our inspiration for our convertible shower from the YouTube channel Eamon and Bec when they did their second van build. The shower is hidden in a cabinet, and when you want to use it, you open up the cabinet and flip up the counter. This design gives us more counter space for cooking or working and allows for a more open concept layout in the van.
Before you install your shower, you should have the water lines running from the water tank, water pump, and water heater (optional) completed before beginning this. See our camper van water system post for a step-by-step guide.
Planning the Shower Build
The first step is deciding how much space you want to dedicate to the shower area in the camper van. This will help you determine the size of shower pan to use. Our shower pan is 27 inches by 24 inches. Next you need to plan where in the van you want to install the shower. You will be cutting a hole in the floor where the drain is so you need to make sure the drain hole isn’t lined up with a rib on the bottom or end up on top of the fuel tank. Depending on the shower pan you choose, the drain could be on the center, left side, or right side.

Planning the shower build
Building the Base For the Shower Pan
Materials and Tools Needed:
- 1/2 inch Birch Plywood
- Table Saw or Circular Saw
- Miter Saw
- Kreg K4 Pocket Hole Jig
- 3/4 inch Kreg Screws
- Drill
Once you have the shower pan, you can build a base for the shower pan to sit in. This gives the shower pan stability. We used 1/2 inch Birch plywood and a Kreg Jig tool to make the base around the shower pan. The height depends on how high your shower pan is. This base will be your guide for framing out the shower walls.
Framing the Shower Walls
Materials and Tools Used:
- Pine 2x2
- Pine 2x4
- 2 1/2 inch Screws - Multi Material
- Miter Saw
- Kreg K4 Pocket Hole Jig
- 2 1/2 inch Kreg Screws
- Drill
- Jig Saw
- Hole Saw
Once you have your shower pan and base built, you can begin framing out the shower walls. The wall height is based on how high your counters are. We chose to add 1/4 inch plywood trim on top of the framing so it looks nice when you flip open the counter so we took 1/4 inch off the counter height to compensate for this.
Our counters (without countertops) were 30 inches tall so we took 1/4 inch off and made our shower walls 29 3/4 inches tall. Once we added the trim on top they were 30 inches like our other counters. Note that our counter height was mostly determined by the windows that were installed before we purchased the van.
We used a combination of 2x2s and 2x4s to frame out the shower. Our shower is next to one of the benches to our bed and we used 2x4s to frame out our benches for extra support. Since the right shower wall shares framing with the bench we used 2x4s on that side. You can use 2x2s for the whole shower build if you don’t need extra support for a bench.
Framed out shower area
In the picture, you can see we used L brackets to hold the pieces of wood together. We realized that it was hard to keep things square this way and we should have been using the Kreg Jig to join the wood. If we did it again, we would use the Kreg Jig instead of the brackets.
Using your counter height and shower pan size you can start framing out the shower. To frame out the sides you basically make a square with the 2x2s with the Kreg Jig, and then add additional supports in the middle as needed. Then screw the squares down to the floor using 2 1/2 inch screws.
For the back wall we screwed a 2x2 into the furring strips across the top, and then joined the two sides together. We also screwed a 2x2 into the furring strips right above the shower pan so we have something to screw the shower wall into. The back doesn’t need uprights since you are screwing directly into the furring strips.
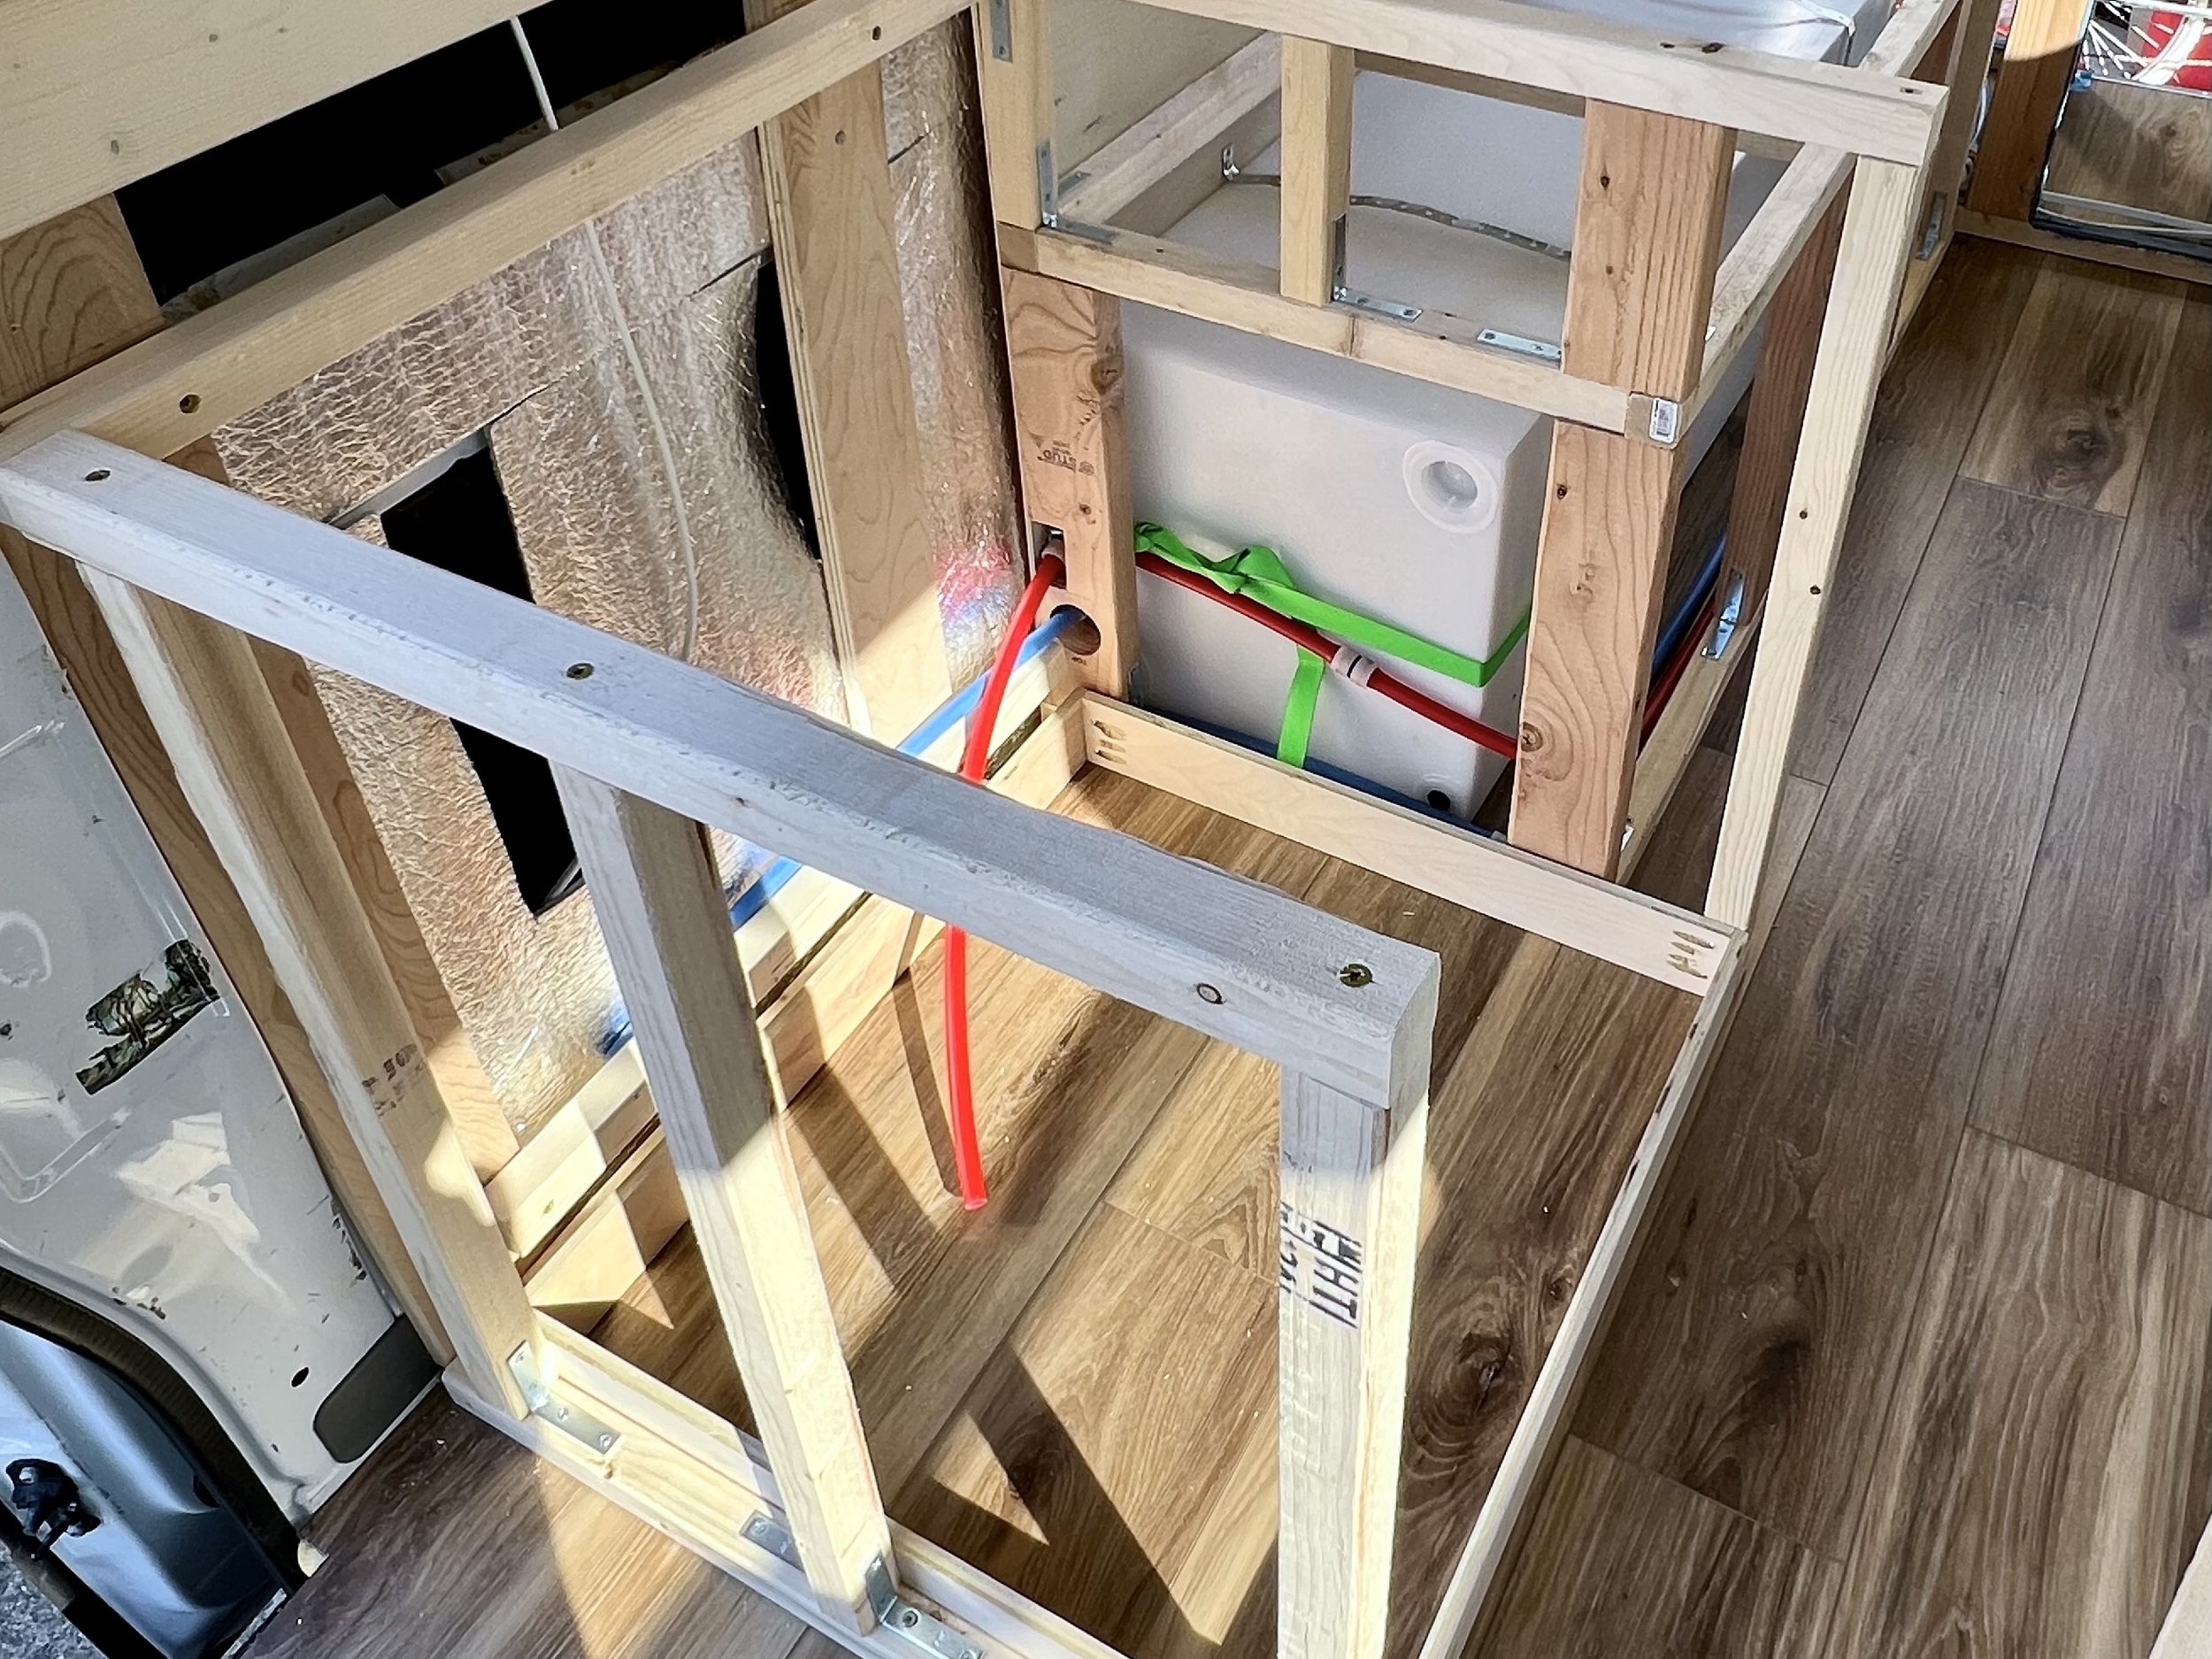
Since we used 2x4s on one side of the frame, we had to create holes with a jig saw and hole saw to get the Pex-A pipes through to the back wall of the shower.
Installing the Shower Water Lines
Materials and Tools Used:
- 1/2” Pex-A pipe
- Pex-A Expansion Rings
- Pex-A Expansion Fittings
- Pex pipe cutters
- Manual expansion tool or Milwaukee Pex Expander tool
- Blue Monster Teflon Tape
- Delta Universal Shower Valve
- 1/2” female NPT to Pex-A x 3
- 1/2 inch female NPT to Pex-A drop ear elbow
Full instructions on how to use Pex-A water lines and connections are in our water system article.
We ran Pex-A lines from the water pump and water heater to the shower area. We chose to run them in front of the water tank to keep them away from the walls to help prevent freezing. Once we got to the front of the water tank we ran them to the wall so we could run them to the shower. At the shower valve, we used a T connector on the hot and cold lines to run them to the shower valve and also allow the lines to continue to the sink.


The shower valve connection threads are all 1/2 inch male NPT. We used a 1/2 inch female NPT to Pex-A fitting to connect the Pex-A lines to the shower valve. We also used this fitting between the shower valve and connection for the shower head. The connection for the shower head is a 1/2 inch female NPT to Pex-A drop ear elbow.

Pex-A lines to shower valve and shower head
Once you’ve connected the Pex-A line to both the valve and the drop ear elbow, screw the elbow into the wall. It’s easier to connect the Pex-A to the drop ear elbow before you screw it into the wall. Note that you can get caps for the drop ear to pressure test the system.
All NPT connections were wrapped with plumbing tape. Make sure to wrap the tape in the same direction you are tightening the fitting. We also added a small amount of joint compound to the threads to prevent leaking. The joint compound isn’t necessary but we wanted to make sure the connections didn’t leak since they are behind a wall.
The shower valve comes with a black plastic trim piece. We didn’t use this in our build because the the walls in our van are thinner then a traditional framed out wall with 2x4s. We did use this trim piece as a template when we cut the hole in our shower wall for the shower valve.

Testing the shower
The shower valve also comes with a test cap. This allows you to pressure test the shower valve and make sure none of your connections leak before you seal the wall up. We highly recommend pressure testing everything before you close up the walls. We did multiple pressure tests just to be sure.
Since we have a convertible shower the valve placement is going to be lower than on a traditional shower. The center of the valve is where the valve trim kit will be installed (the handle to turn the shower on/off and select temperature). When picking a location for this, make sure it won’t interfere with a toilet if you plan on placing one in the shower. We placed ours down low and off to the right so we still had room for the toilet.
When you choose the placement for the arm that holds the shower head, make sure it’s low enough so the counter can close on top of it. The shower head will sit up higher than the arm. Again this is all going to look super low compared to what you are used to. Don’t worry, an additional bracket will be placed up on the wall to hold the shower head when you take a shower.
Installing the Shower Pan and Drain
Materials and Tools Used:
- Shower Pan
- Drain
- Tailpiece
- Drill
- Hole Saw
- Painter’s Tape
- Plumbers Putty
- Caulk Gun
- Gorilla Heavy Duty Construction Adhesive
- Spray Paint
- Deburring Tool
Before installing the shower pan, we first remeasured to make sure the hole for the drain was going to be in the correct place in the van. Once we were sure everything was still in the correct place we used a hole saw to drill out the drain on the shower pan.
The shower pan instructions said to use a 1 3/4 inch hole saw to drill out the drain on the shower pan. We tested the hole saw size on a piece of plywood first and realized the hole wasn’t quite big enough for the drain so we tested the 2 inch hole saw and that fit the drain perfectly.

Shower drain hole in van floor
Before drilling on the shower pan, use painters tape to tape over the entire drain to prevent the pan from cracking. Put the shower pan back in the van exactly where you plan to install it and make sure the drain is in the correct position. Using the 2 inch hole saw, drill through the shower pan. Stop once you’re through the shower pan. The hole saw drill bit should have left a mark in the floor. If not, go a little deeper or mark the spot to be drilled.
Move the shower pan out of the way. Now drill a hole all the way through the van floor. We highly recommend using safety glass and a mask for this part. Once the hole is drilled, deburr any sharp metal edges and treat the exposed metal with spray paint and let it dry.

Close up of shower drain
Next you can install the drain on the shower pan. Unscrew the brass ring from the drain. Make sure you note the order the washers, lock nut, and flange are on the drain, then take them all off the drain. Apply plumber’s putty or sealant to the bottom lip of the drain. This will create a seal between the drain and shower pan on top side. Then place the rubber washer, paper washer, and lock nut onto the drain. The drain needs to be extended to make it all the way through the floor. Add the tailpiece to the drain, then screw on the brass ring to tighten everything down.
Now we need to test for leaks in the drain. Outside the van, add a bunch of water to your shower pan look for leaks. If you don’t see any leaks, we can install the shower pan. Note that it’s hard to fix a leak once the pan is installed so take your time and make sure it’s good before installing it.
To install the shower pan, you need to glue it to the floor. Using a caulk gun, caulk Gorilla Construction Adhesive to the van floor and place the shower pan on the floor and press down. We added a weight to the shower pan to hold it in place until it dried.
Building the Outside Shower Drain
Materials and Tools Used:
- Threaded Sink Drain Adapter
- 1 1/2 inch Schedule 40 PVC Pipe
- 1 1/2 inch PVC DWV Female Trap Adapter
- Spears 90 Degree Elbow
- 1 1/2 inch to 3/4 inch reducer
- 3/4 inch PVC Pipe
- 3/4 inch Slip Male Adapter to 3/4 inch MPT
- Shutoff Valve
- PVC Cement and Primer
We chose to not install a grey water tank under the van so we could still use our shower in freezing temperatures. Instead we chose to run a drain outside outside the van with a shutoff valve. When we want to take a shower, we just place one of the grey water jugs from under the sink under the drain.
We aren’t going to admit how many trips to the hardware store we took to build this drain. We used PVC pipes to extend the tail piece down, then ran the PVC to the passenger side of the van, and had it come out behind the sliding door step. A shutoff valve is on the end to close off the drain if needed.
We started by attaching the threaded sink drain adapter to the tailpiece. Then we attached 1 1/2 inch schedule 40 PVC pipe and ran it so it would be just below the side of the van. Then we attached a 1 1/2 inch PVC DWV female trap adapter and screwed it to a Spears 90 degree elbow. Then we attached a 1 1/2 inch to 3/4 inch reducer and attached it to 3/4 inch PVC pipe. The 3/4 inch PVC pipe is attached to a 3/4 inch slip male adapter to 3/4 inch MPT. The shutoff valve is then screwed into this. This is how we installed our system.
A few things to note. We used primer and cement on all non threaded PVC connections. When we measured the PVC pipe and fittings, we made sure the handle for the shutoff valve was just past the side of the van so it’s easy to access. Since we didn’t install a grey water tank under the van, a p-trap wasn’t necessary.
Installing the Shower Walls
Materials and Tools Used:
- 1/4” Birch Plywood
- FRP Board
- FRP Trim Pieces
- Table Saw
- Circular Saw
- 3/4 inch Wood Screws
- Drill
- Countersink Drill Bit
- Hole Saw
- Jig Saw
- Waterproof Treatment for Plywood
- PL Construction Adhesive
- Caulk Gun
- GE Advanced Silicone Caulk
The walls are made of FRP board glued to 1/4 inch Birch plywood. FRP board (Fiber Reinforced Plastic board) is water and mold resistant and is very lightweight which is perfect for a camper van shower area. It’s also extremely cost effective compared to other options. The only downside is it can be difficult to cut because it’s so flexible and can make a pretty big mess if you’re using a saw.
Installing the Plywood Walls

Plywood walls installed in shower
First we installed the 1/4 inch Birch plywood walls. The walls were cut to the height of the 2x2 framing and sit on the 1/2 inch plywood base for the shower pan. We used cardboard to make a template for each wall, then used a table saw to cut the plywood.
For the piece of plywood along the back wall, you will also have to cut holes for the shower valve and shower head. We used the black trim piece that came with the shower valve as a template. We used a jig saw to cut the shower valve and a hole saw for the shower head.
For the side wall on the left, we used a hole saw for our marine hatch with detachable cover that we will pass the composting toilet wire and tube through along with our pee funnel. This hatch allows us to put those all behind the wall and seal up the shower area when we use the shower.
For a full guide on how we installed our toilet, check out our Nature's Head Composting Toilet installation post.
Once everything is cut do a quick test to make sure everything fits properly on the walls and make any adjustments as needed.
We then applied a waterproofer to the birch plywood. This is something we decided to do as an extra precaution but isn’t required since the wall will be protected by the FRP. The waterproofing takes 24 hours to dry.
After the plywood pieces were dry, we used them as a template to cut the FRP board. Then we installed the walls in the van. We installed the rear wall first screwing them to the 2x2s with 3/4 inch wood screws. We used a countersink bit to make the screws flush with the wood. Then we installed the side walls using the same method.
Installing the FRP Board

FRP board installed on shower wall
After the walls are installed, the next step is installing the FRP board. FRP can be a pain to work with and can make a mess when cutting. If using powered saws, always wear a mask and glasses. If using a circular saw use a masonry or carbide blade in your saw. Electric shears are another good way to cut FRP and is less messy than a circular saw.
We found it a lot easier to put something rigid under the FRP board while cutting it to help stabilize it and prevent cracking since it’s very thin and will bow on saw horses. We ended up using leftover XPS foam board from our floor insulation.
As mentioned earlier, before installing the plywood walls, we used them as template for the FRP. Cut the FRP board using a circular saw or electric shears. Use a hole saw for the shower arm/flange and a jigsaw for the shower valve cutout. Test the FRP board to make sure they fit. You may need to cut them slightly smaller than the plywood so the trim pieces sit flush with the edges of the plywood.
Attach the FRP board to the plywood using PL Construction adhesive. The FRP board should overlap with the lip of the shower pan. Don’t worry if there are some gaps in the corners since we’ll be sealing them with caulk. Attach FRP trim pieces on the top and sides. The FRM should slide into the channels on the trim pieces and should sit flush with the edge of the plywood. Next used white GE Advanced Silicone Caulk for Kitchen & Bathroom to caulk along the corners and the shower pan.
We added 1/4 inch Birch plywood trim painted in our cabinet color to the top of the shower and in front of the shower pan base.
Installing the Arm/Flange and Shower Head
Materials and Tools Used:
- Blue Monster Teflon Tape
- Dura Faucet Shower Wand
- Delta Faucet Arm and Flange
- GE Advanced Silicone Sealant
Next we’ll be installing the arm that holds the shower head. The arm has a flange that goes on the back and acts as a trim piece. The arm attaches to the drop ear elbow you installed with the water lines. It’s easy to scratch the shower arm when placing the flange so be careful during the install.
Apply teflon tape to the threads on the shower arm. Gently place the flange over the threads that will screw into the drop ear elbow. Carefully apply joint compound to the threads then screw the shower arm into the drop ear elbow. To prevent water from getting behind the wall and to secure the flange in place, apply GE Advanced silicone to around the flange.
Apply teflon tape to the threads on the other side of the shower arm. Screw the shower head to the shower arm. If anything is leaking, place a rag over the assembly to prevent scratching and tighten with channel locks.
If you want to be able to mount your shower head to the wall while you shower, attach a bracket up on the wall for the shower head.

Shower head and faucet installed
Installing Shower Valve Trim Kit (Hot/Cold Selector)
Materials and Tools Used:
First, take the test cap off the shower valve. There will also be a small black piece inside the valve that needs to be removed. The Delta shower handle kit has all the parts needed for the install.
Insert the cartridge into the valve and make sure to line hot (left side) and cold up in the right direction. It’s labeled on the ring that should be facing out. This is also where you can adjust temperature settings if needed. Make sure to line up the notches on the valve and cartridge. Once inserted take the silver nut that was holding the test cap in place and hand tighten on the valve. Place the black washer over the nut. This will help hold the trim piece in place.
The face plate (trim piece) is next. Take silicone around the edge of the foam on the back. Line the screw holes up with the valve kit and install using a screwdriver. We realized we needed shorter screws at this point because our setup was not as deep in the wall so we had to buy shorter screws. Clean silicone up if necessary. Now install the handle. The shower is now complete and ready to be tested.
Butcher Block Countertop
The butcher block countertop was cut to size with a table saw. The counter needs to be able to lift up to access the shower. We accomplished this by cutting a 2 1/2 inch strip of the back to go against the wall to create 2 separate pieces. We used a 30 inch piano hinge to join the pieces together. This hinge allows us to lift up the countertop. The left a 1/4 inch gap between the two butcher block pieces to accommodate the piano hinge. A hook and eye is then used to hold the counter up. We screwed the hook into the butcher block and the eye into the wall.
We were originally concerned that the hook and eye would be strong enough to secure the butcher block, but so far everything has been solid.

Close up of counter and cabinet doors
Cabinet Doors
Secure the cabinet doors to the trim on the shower area. We used RV latches to keep the doors shut while driving. One side of the latch goes on the doors and the other side goes on the underside of the counter top. To open the cabinet you first have to open the doors and then flip the counter top up.

Shower Build Final Thoughts
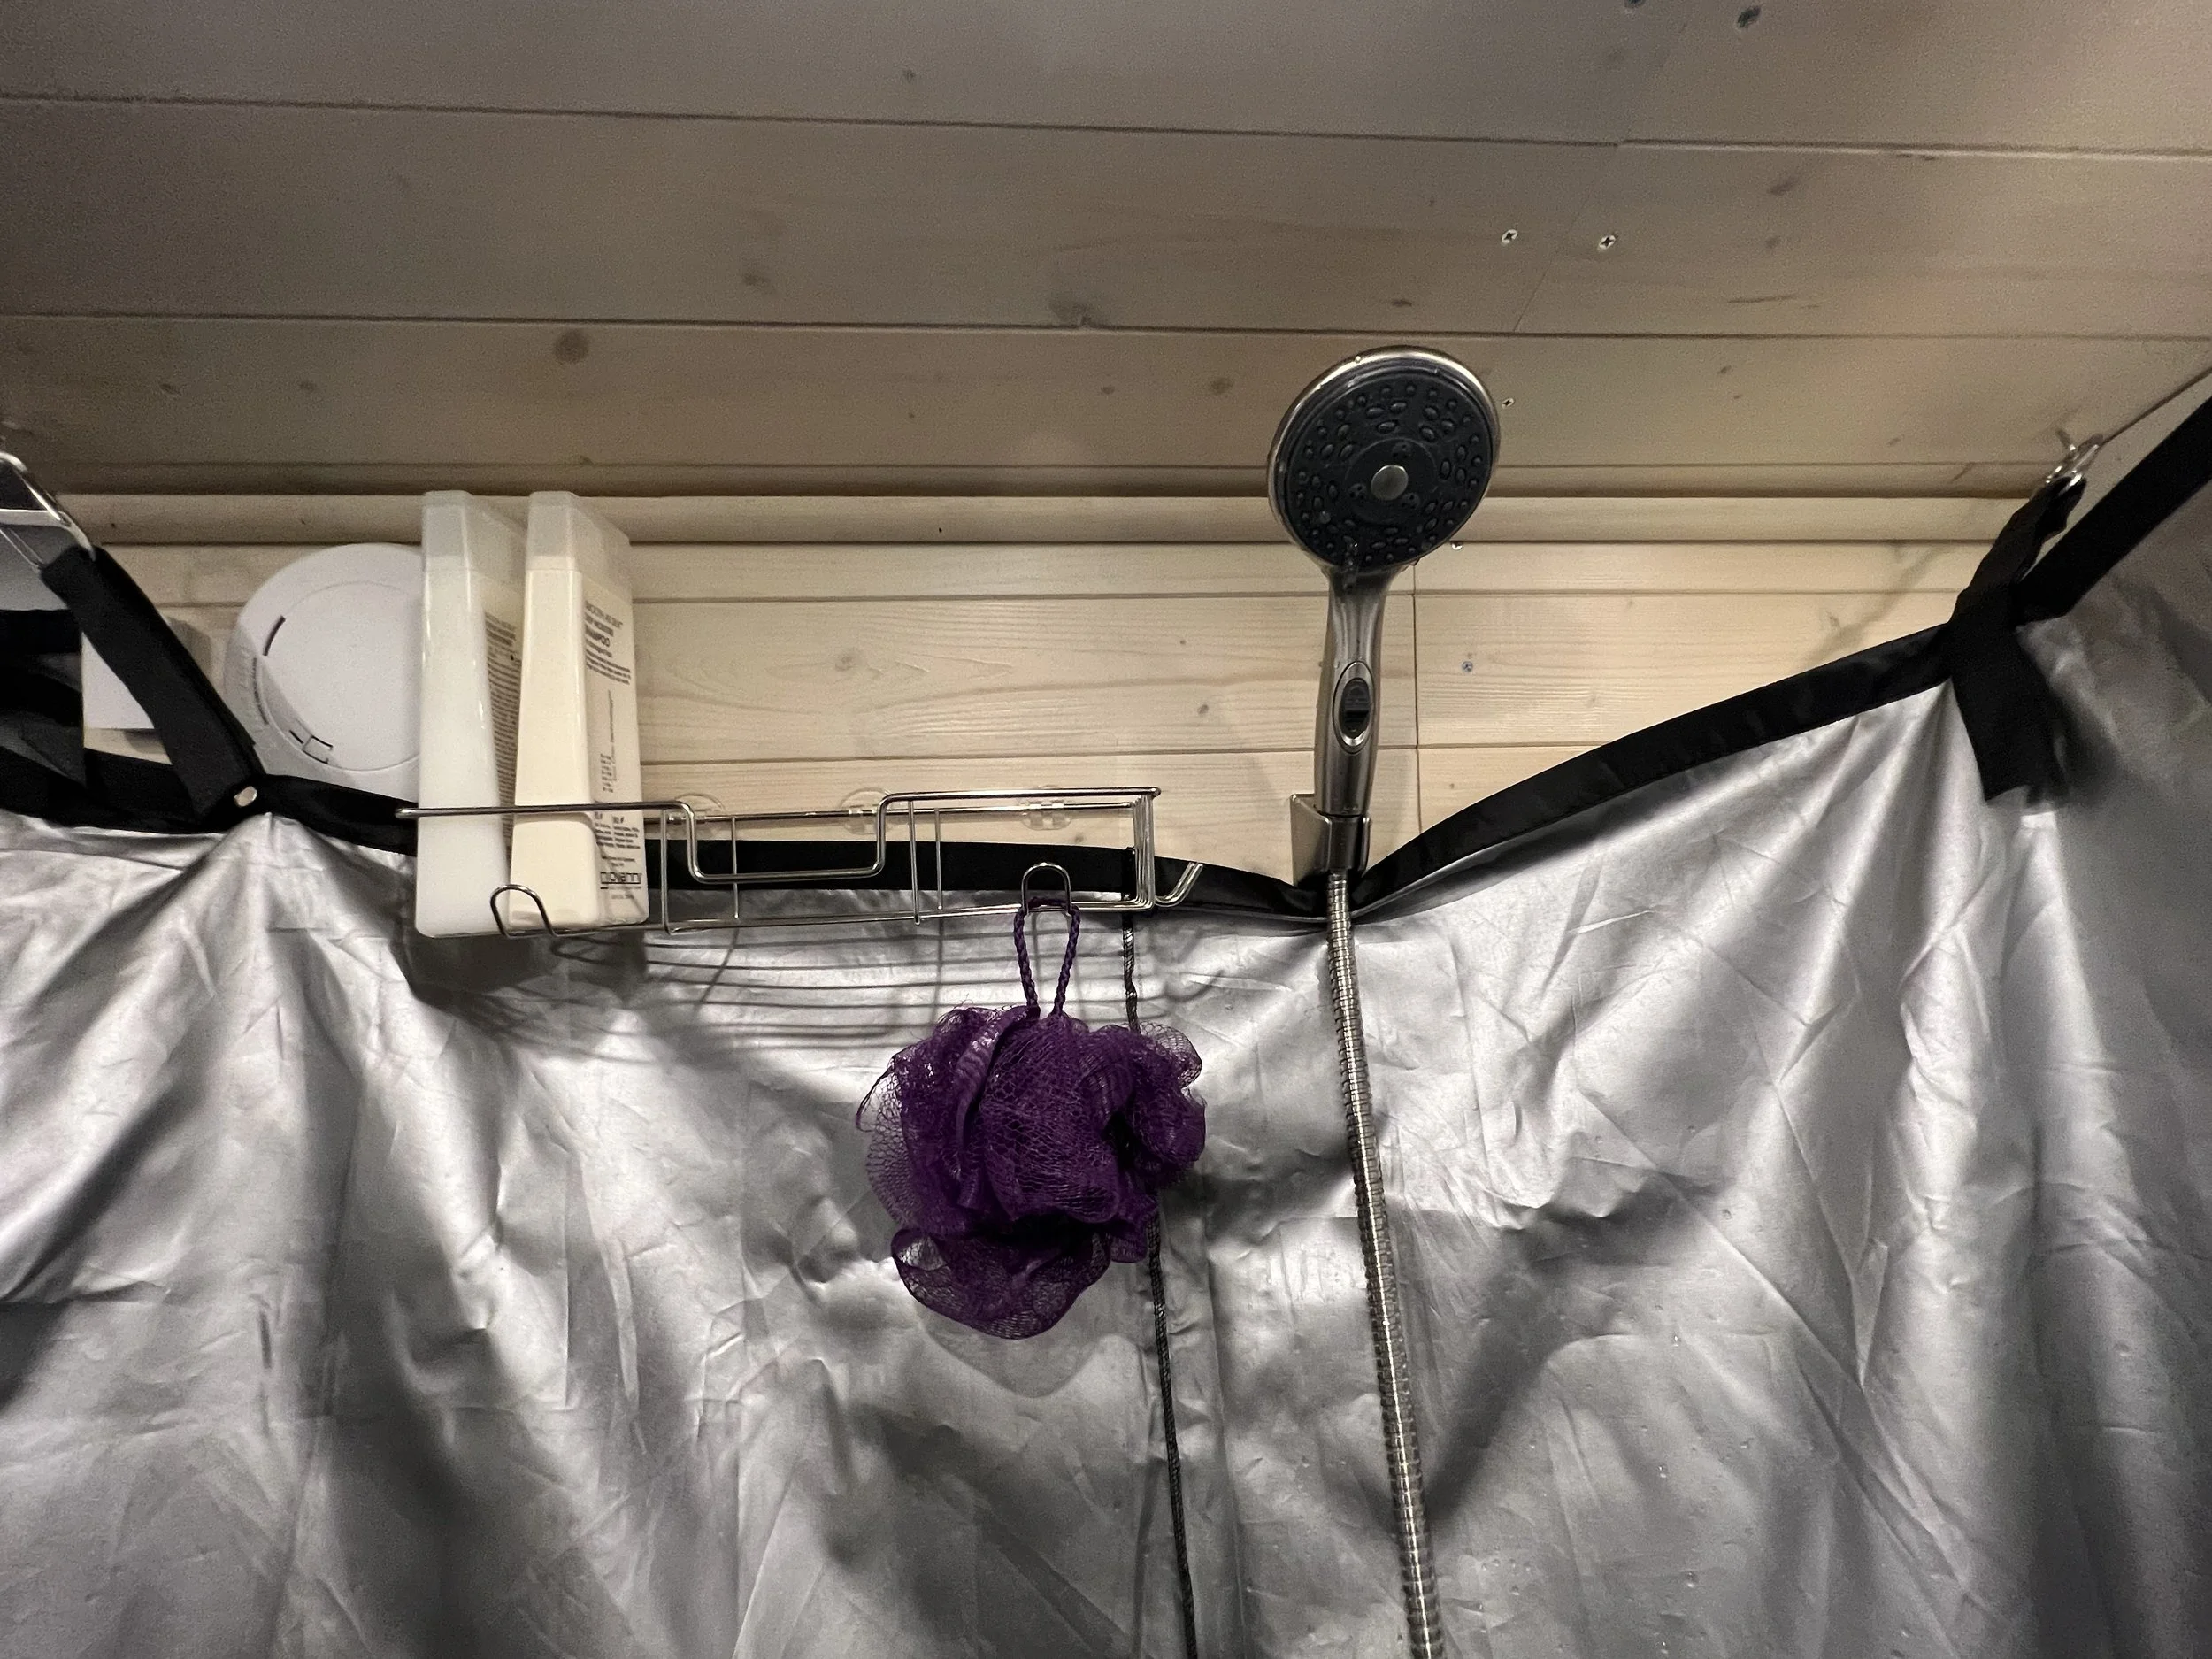
Overall we have been happy with the shower in our camper van. It took some time to get used to but it gets easier to set up every time we use it. We made a few adjustments to the setup as we used it to make it easier such as adding a shower caddy for our shampoo and soap. We also found a zip up shower curtain that fits our shower perfectly.
To see our full shower setup, check out our post on how we shower in our camper van.
If we built another van, the biggest adjustment we would make is moving the shower to the driver’s side of the van. This would give us more options for grey water tanks underneath the van if we wanted. For us, a shower and toilet in our van conversion is a necessity for adventuring off-grid, and would recommend considering including them in your camper van conversion.